
| 일 | 월 | 화 | 수 | 목 | 금 | 토 |
|---|---|---|---|---|---|---|
| 1 | ||||||
| 2 | 3 | 4 | 5 | 6 | 7 | 8 |
| 9 | 10 | 11 | 12 | 13 | 14 | 15 |
| 16 | 17 | 18 | 19 | 20 | 21 | 22 |
| 23 | 24 | 25 | 26 | 27 | 28 |
- 데이터엔지니어링
- mlops
- redis bloom filter
- hadoop
- AWS SageMaker
- 클라우데라
- Data engineering
- spark
- kubernetes
- 하둡에코시스템
- BigData
- kafka
- Spark structured streaming
- 개발자혜성
- Terraform
- 빅데이터플랫폼
- apache spark
- recommendation system
- 개발자
- Python
- dataengineer
- 빅데이터
- DataEngineering
- eks
- 추천시스템
- 하둡
- cloudera
- 블로그
- 데이터엔지니어
- pyspark
- Today
- Total
Hyesung Oh
빅데이터 플랫폼 Pilot 프로젝트 04 feat. Cloudera Data Platform 본문
1.사전 작업, CDP 설치 url 받아오기
□ Installer.bin 설치 URL 받아오기
a. TRY NOW 클릭

b. 개인정보 입력

c. install bin 파일 설치 url 받아옴 : https://archive.cloudera.com/cm7/7.1.3/cloudera-manager-installer.bin
ISSUE : wget은 외부망이 막혀있어서 작동하지 않음 → 매니저님이 외부망 열어주심
2. 가상머신 환경 설정
□ 고정 IP할당
/etc/sysconfig/network-scripts/ifcfg-eth0 파일 수정
기본 세팅된 상태로 제공받음
□ 모든 서버 yum update 수행
a. sudo yum update -y
□모든 서버 hosts 파일수정
a. sudo vi /etc/hosts
수정 접속 할 서버들의 IP, 호스트명, 호스트명_alias를 추가한다.
b. /etc/hosts 파일에 아래 내용 입력 후 저장
10.0.2.42 hadoop1.hyesung.com hadoop1
10.0.2.203 hadoop2.hyesung.com hadoop2
10.0.2.181 hadoop3.hyesung.com hadoop3
10.0.2.39 hadoop4.hyesung.com hadoop4
10.0.2.86 hadoop5.hyesung.com hadoop5
c. sudo service network restart
□ hostname 설정
a. sudo hostnamectl set-hostname cdp1 #5개 환경 모두 설정
□ 방화벽, 기타 매개변수 설정
a. selinux disable 설정 (이전 페이지 참고)
□ CentOS 기본 네트워크룰 삭제 (로컬에서 작업시에 설정했던 경험때문에 추가하였지만, 이번 과제에서는 하지 않아도 되었음)
a. /etc/udev/rules.d/70-persistent-net.rules 모두 주석처리
3. Cloudera Manager Installation Wizard를 이용한 CDP 설치 및 Other Software 설치
□ Cloudera Manager Installer.bin 파일 설치
a. wget https://archive.cloudera.com/cm7/7.1.3/cloudera-manager-installer.bin
installer.bin 파일을 web에서 다운로드합니다.
b. chmod u+x cloudera-manager-installer.bin
파일 권한을 변경해줍니다.
□ Install Java Development Kit, openjdk8 설치(Oracle 아님)
a. sudo yum install java
b. which java
link 확인
c. readlink -f /usr/bin/java
link 열어서 환경변수 설정에 사용할 주소 확인
d. sudo vi /etc/profile 파일 수정
최 하단에 아래 텍스트 추가
export JAVA_HOME=/usr/lib/jvm/java-1.8.0-openjdk-1.8.0. ~3에서 확인한 대로
export PATH=$PATH:$HOME:$JAVA_HOME/bin
e. source /etc/profile
f. echo $JAVA_HOME
□run installer
□ 기존 CDH설치 시에는 다음과 같은 순서였습니다.
- Install Cloudera Manager Server
- Install Databases
- Set up Cloudera Manager Database
- Start Cloudera Manger Server
- 하지만 이번 CDP Trial Version Installation 작업은 위의 과정이 모두 하나로 자동화 되어있습니다.
a. sudo ./cloudera-manager-installer.bin
위의 명령어를 실행 후, 설치 유저 인터페이스창이 뜹니다. 확인을 눌러주면 다음과정으로 쉽게 넘어가게 됩니다.
b. 설치 완료 후, Cloudera Manager Host의 호스트명(우의 /etc/hosts 파일 참고)을 이용하여 서버에 접속합니다. port는 7180입니다.
url 예시 : http://hadoop1.hyesung.com:7180
□ Cluster Name 설정
a. 기본으로 설정되어 있는 Cluster 1 으로 설정하였습니다.
b. continue 클릭
□ Cluster Agent 구성
a. 호스트 이름 박스안에 hadoop[1-5].hyesung.com입력
* /etc/hosts 파일의 호스트명을 추가해줍니다.
b. 각 노드간 통신을 위해 SSH port 설정
default port는 22
c. 검색 버튼 클릭
□ Select Repository 단계입니다. cloudera manager repo, parcel repo 설정(public repo로 설정)
□ JDK Licence 설치
a. continue 누르면 알아서 openjdk를 설치해줍니다. (기존 CDH시에는 Oracle설치해줘서 라이센스 체크 해제해야했음)
□ Cloudera Manager에 접속 할 계정 정보 및 동시 실행 될 노드의 개수 입력
a. click continue
□ Agent 설치 진행
a. 설치 진행에 error 발생시 해당 실패노드 재설치 버튼 클릭
b. 완료시 click continue
□ Inspect Cluster 진행 후 발생하는 error 및 warning 해결
a. sudo vi /etc/sysctl.conf 파일 수정

vm.swappiness=1 추가 #1-10사이 설정

b. sudo vi /etc/rc.local 에 제일 아래 두문장(작업 상세란 열어보면 찾을 수 있음, 복사 붙여넣기) 추가

*echo never > ~~
echo never > ~~ 부분

4. Parcel 선택 & 배치
□ 노드별 역할 구성
host1host[2-5]host[2-5]
| Master Hosts | Utility Hosts | Worker Hotsts |
|
|
|
5. 기타 설정법
□ hue notebook 및 pyspark, spark sql 활성화
a. Cloudera Manager → Hue configuration
b. configuration 내 좌측 목록에 Hue 범주 내 고급 클릭
c. hue_safety_valve.ini에 아래 문장 추가 및 적용 후 클러스터 재시작

[spark]
# The Livy Server URL.
livy_server_url=http://localhost:8998
[notebook]
#notebook 활성화
show_notebooks=True
[[interpreters]]
#interpreter config
[[[sparksql]]]
name=Spark SQL
interface=livy
[[[pyspark]]]
name=PySpark
interface=livy
d. Apache livy 설치
- Pyspark Interpreter 활성화를 위해 진행해야하는 부분입니다만, 시간 관계상 진행하지 못하였음을 밝힙니다.
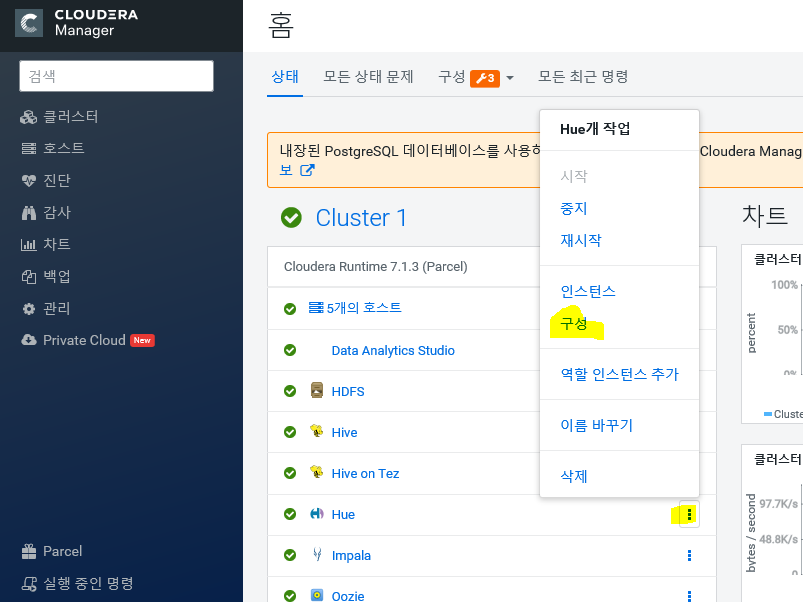
- node별 role 추가 & 삭제
Role Instances | 6.3.x | Cloudera Documentation
Adding a Role Instance Minimum Required Role: Cluster Administrator (also provided by Full Administrator) After creating services, you can add role instances to the services. For example, after initial installation in which you created the HDFS service, yo
docs.cloudera.com
□ Parcel별 역할 인스턴스 추가하기
a. add role instances
1. Go to the service for which you want to add a role instance. For example, to add a DataNode role instance, go to the HDFS service.
2. Click the Instances tab.
3. Click the Add Role Instances button.
b. delete role instances
1.Click the service instance that contains the role instance you want to delete. For example, if you want to delete a DataNode role instance, click an HDFS service instance.
2. Click the Instances tab.
3. Check the checkboxes next to the role instances you want to delete.
4. If the role instance is running, select Actions for Selected > Stop and click Stop to confirm the action.
5. Select Actions for Selected > Delete. Click Delete to confirm the deletion.
6. TroubleShooting Installation Problem
원격 repo URL reslove host error
□ 문제 상황
username, password는 parcel 원격 repo url 구성시 필요
하지만 license가 있는 경우에만 발급 받을 수 있음
Trial version의 경우 parcels 원격 repo url
: https:/archive.cludera.com/cdh7/7.1.3.0/parcels/
→ resolve host error 발생
□ 해결책
Local Repo를 만들어서 설정해주는 방법으로 해결
Inspect Cluster error or warning
□ 문제 상황
Inspect Host Warning
IOException thrown while collecting data from host : Connection refused
□ 해결책
hostname을 제대로 설정했는지 확인
hostnamectl set-hostname (* your hostname)
openjdk8 installation failed
□ 문제 상황
Openjdk8 installation failed
□ 해결책
sudo yum update -y
sudo yum install java #install openjdk
→ JAVA 환경변수 설정까지 참고
Failed to start server reported by cloudera-manager-installer.bin
□ 문제 상황
"Failed to start server" reported by cloudera-manager-installer.bin. /var/log/cloudera-scm-server/cloudera-scm-server.logcontains a message beginning Caused by: java.lang.ClassNotFoundException: com.mysql.jdbc.Driver...
SELinux가 enforce로 세팅이 되어있는 경우임
□ 해결책
Disable SELinux
sudo setenforce 0 on the Cloudera Manager Server host.
영구적으로 Disable하기 위해서는 아래 파일에서 SELINUX=enforcing 을 SELINUX=disabled 로 변경후 저장한다
/etc/selinux/config/selinux
Installation interrupted and installer does not restart
□ 문제 상황
Cloudera-Manager 삭제 후 재설치 해야하는 상황
□ 해결책
yum remove 'cloudera-manager-*'
만약 이미 배포까지 했는데 삭제 후 다시 설치하려고 한다면
배포한 서버별로 아래 명령어를 실행해주어야 한다
service cloudera-scm-agent stop
service cloudera-scm-server stop
하지만, 이미 pssh 모듈을 사용하고 있으므로
기존에 작성해둔, hosts.txt 를 바탕으로 각 명령어를 공통적으로 뿌려준다
pssh -h ~/hosts.txt service cloudera-scm-agent stop
pssh -h ~/hosts.txt service cloudera-scm-server stop
그 이후, node 1에만 클라우데라를 설치해주었으므로 아래 명령어를 활용하여 삭제해준다
yum remove 'cloudera-manager-*'
(클라우데라 설치되어있는 경로 들어가서)
yum clean all
그리고 난 다음에,
sudo /usr/share/cmf/uninstall-cloudera-manager.sh
명령어를 실행하여 완전히 지워버린다
Agents fail to connect to Server
□ 문제 상황
Agents fail to connect to Server. You get an Error 113 ('No route to host') in /var/log/cloudera-scm-agent/cloudera-scm-agent.log.
SELinux가 enforce로 세팅이 되어있는 경우임
□ 해결책
서버 호스트의 아래 파일 확인
/var/log/cloudera-scm-server/cloudera-scm-server.log
agent 호스트의 아래 파일 확인
/var/log/cloudera-scm-agent/cloudera-scm-agent
그 후 Disable SELinux and iptables.
'Data Engineering' 카테고리의 다른 글
| 추론 최적화 시리즈 [1] Bert4rec Pytorch module을 Torch-Tensorrt로 compile 하여 Tritonserver로 실시간 추론하기 (0) | 2024.07.15 |
|---|---|
| Hive, RDMBS, Hbase, HDFS 개념잡기 (0) | 2020.10.19 |
| 빅데이터 플랫폼 Pilot 프로젝트 03 feat. Cloudera Data Platform (0) | 2020.08.31 |
| 빅데이터 플랫폼 Pilot 프로젝트 02 feat. Cloudera Data Platform (0) | 2020.08.31 |
| 빅데이터 플랫폼 Pilot 프로젝트 01 feat. Cloudera Data Platform (0) | 2020.08.31 |

